
Durga Saptashloki PDF: A Comprehensive Guide
This guide explores accessing the Durga Saptashloki in PDF format, covering reliable download sources, authenticity checks, and variations available online today.
Numerous PDFs exist, including versions from Sri Yogeshwaranand Ji and Sumit Girdharwal, alongside options offering translations and associated texts like Durga Apad Uddharaka Stotram.
The Durga Saptashloki represents a potent and concise selection of verses from the larger Durga Saptashati, also known as Devi Mahatmyam. These seven powerful shlokas (verses) are highly revered for their ability to invoke the divine energy of Goddess Durga, offering protection and fulfilling desires.
Widely available in PDF format, the Saptashloki facilitates easy access for devotees seeking spiritual upliftment. These PDFs often include transliteration, translations, and explanations to aid understanding and proper recitation. The accessibility of these digital versions ensures the ancient wisdom is readily available to a global audience, fostering devotion and practice.
What is Durga Saptashati?
Durga Saptashati, or Devi Mahatmyam, is a foundational Hindu scripture comprising 700 verses, dedicated to the Goddess Durga. It narrates her victories over demonic forces, symbolizing the triumph of good over evil.
The Durga Saptashloki is a distilled essence of this larger text, containing seven particularly potent verses. Many PDFs circulating online present these shlokas alongside portions of the complete Saptashati for contextual understanding. Devotees often access these PDFs to deepen their connection with the Goddess and benefit from the scripture’s protective and empowering energy.
The Significance of the Seven Shlokas
The seven shlokas within the Durga Saptashloki are considered highly sacred and powerful, representing a concentrated form of the Goddess Durga’s energy. These verses are often chanted during Navratri and other auspicious occasions.
PDF versions readily available online highlight these specific verses, making them accessible for individual practice. The belief is that consistent recitation of these shlokas offers protection from negativity, fulfills desires, and fosters spiritual growth. Many downloadable PDFs also include transliterations and translations to aid understanding and correct pronunciation.

Understanding the Text
PDFs of the Durga Saptashloki often include scriptural context, detailing its origins within the Durga Saptashati and the divine narrative it embodies.
Origin and Scriptural Basis
The Durga Saptashloki originates from the larger Durga Saptashati, also known as Devi Mahatmyam, a central text within the Shakta tradition of Hinduism. PDFs readily available online showcase these seven powerful verses extracted from the 700 verses of the Saptashati.
These shlokas are believed to be a concise yet potent form of worship, offering the benefits of reciting the entire scripture. The scriptural basis lies in ancient texts, detailing Goddess Durga’s victory over demonic forces. PDF versions often include introductory notes explaining this lineage and the verses’ significance within the broader context of Hindu mythology and spiritual practice.
The Story Behind the Shlokas
The Durga Saptashloki’s narrative stems from a dialogue between Shiva and the Divine Mother, as detailed within the Durga Saptashati. PDFs often preface the shlokas with this foundational story: Shiva seeks guidance on easily achieving success, and the Goddess reveals these seven verses as a potent solution.
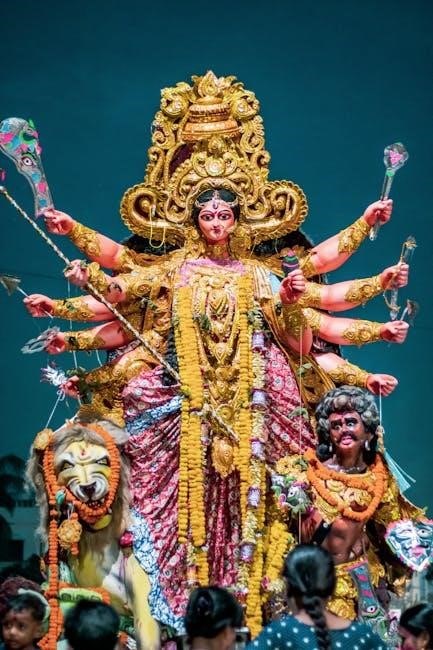
These shlokas encapsulate the essence of Durga’s power and victory, representing her triumph over the demon Mahishasura. Many PDF versions include summaries of this epic battle, contextualizing the shlokas’ meaning and amplifying their devotional impact. The story underscores the Goddess’s protective and empowering nature.
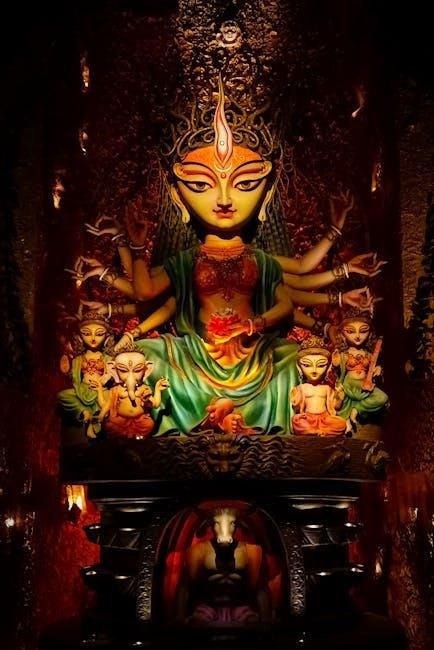
The Divine Mother and Her Power
The Durga Saptashloki venerates the Divine Mother, representing Shakti – the ultimate feminine power. PDFs emphasize her multifaceted nature, embodying strength, protection, and creative energy. She is depicted as the cosmic force behind all existence, capable of both creation and destruction.
Chanting these shlokas is believed to invoke her blessings, offering spiritual upliftment and safeguarding devotees from negativity. PDF introductions often highlight the Goddess’s ability to fulfill desires and overcome obstacles. Her power, as described in the texts, is accessible through sincere devotion and recitation.
Accessing the Durga Saptashloki PDF
Numerous online sources offer Durga Saptashloki PDFs, ranging from free downloads to paid versions, accessible through websites and platforms like Telegram.
Where to Download a Reliable PDF
Finding a trustworthy Durga Saptashloki PDF requires careful consideration. Several websites host these files, including those offering collections of devotional texts. Resources associated with Sri Yogeshwaranand Ji and Sumit Girdharwal are frequently cited.
However, be cautious of unverified sources. Platforms like Scribd and online document repositories often contain user-uploaded PDFs, which may have inaccuracies. Prioritize websites known for religious texts or those affiliated with established spiritual organizations. Checking for clear origins and avoiding sites with excessive advertisements is crucial for ensuring authenticity.
Telegram channels also disseminate PDFs, but verifying the channel’s credibility is essential before downloading.
Free vs. Paid Versions
Durga Saptashloki PDFs are widely available for free download across various websites and platforms like Telegram. These often include basic text versions, sometimes with English transliterations. However, the quality and accuracy can vary significantly with free resources.
Paid versions, typically offered as ebooks or part of larger devotional collections, often boast higher quality formatting, accurate translations, and potentially include commentaries or explanations. These may be found on religious bookstores’ websites or through dedicated spiritual apps.
The choice depends on individual needs; a free PDF suffices for basic recitation, while a paid version offers a more comprehensive study experience.
Ensuring Authenticity of the PDF
When downloading a Durga Saptashloki PDF, verifying its authenticity is crucial. Numerous versions circulate online, and inaccuracies can impact the efficacy of recitation. Cross-reference the text with known, reputable sources – compare it to printed editions or established online scriptures.
Look for PDFs originating from recognized religious organizations or scholars. Be wary of sources with poor formatting, grammatical errors, or deviations from standard Sanskrit transliteration.
Consider the source’s reputation; established websites are generally more reliable than unknown platforms. Prioritize PDFs that include publisher information and copyright details.
Recitation and Practice
Proper Durga Saptashloki recitation often involves establishing a Kalash during Navratri, both in temples and homes, enhancing the devotional practice.
Correct Method of Recitation
Reciting the Durga Saptashloki correctly is vital for maximizing its benefits. During Navratri, a Kalash – a pot symbolizing divine energy – is traditionally installed and worshipped. This practice, common in both temples and homes, creates a sacred space for recitation.
Devotees often chant the seven shlokas with focused intention and reverence. Many prefer to utilize a PDF version of the text for accurate pronunciation and understanding. Consistency and devotion are key, ensuring a connection with the Divine Mother’s power. The PDF serves as a guide, aiding in proper enunciation and comprehension of the verses.
Importance of Navratri
Navratri holds immense significance when practicing Durga Saptashloki recitation. This nine-night festival is dedicated to the worship of Goddess Durga in her various forms, making it the most auspicious time to connect with her divine energy.
Many devotees specifically install a Kalash during Navratri, creating a sacred space for worship and chanting. Utilizing a Durga Saptashloki PDF during this period is common, aiding in focused recitation. The concentrated energy of Navratri amplifies the benefits of the shlokas, fostering spiritual growth and protection.
Setting up a Kalash for Worship
Preparing a Kalash is a vital component of Durga Saptashloki practice, particularly during Navratri. Devotees install it in temples or homes, symbolizing the universe and Goddess Durga’s presence.
Typically, a pot (the Kalash) is filled with water, adorned with mango leaves and a coconut representing divine consciousness. A Durga Saptashloki PDF can be placed near the Kalash as a focal point during recitation. This setup creates a sacred atmosphere, enhancing the power of the mantras and fostering a deeper connection with the Goddess.
Benefits of Chanting
Chanting the Durga Saptashloki, often accessed via PDF, offers spiritual upliftment, protection from negativity, and potential fulfillment of heartfelt desires for devotees.
Spiritual Benefits
Accessing the Durga Saptashloki PDF facilitates a deeper connection with the Divine Mother’s energy. Consistent recitation, guided by the text, cultivates inner peace and strengthens faith.
The shlokas, when chanted with devotion, are believed to purify the mind and heart, dissolving negative karmas and fostering spiritual growth.
Regular practice, using a reliable PDF version, can awaken dormant spiritual potential, leading to increased self-awareness and a profound understanding of one’s purpose.
Ultimately, the Saptashloki serves as a powerful tool for transcending limitations and realizing one’s inherent divinity, readily available through accessible PDF resources.
Protection from Evil
The Durga Saptashloki, readily available as a PDF, is traditionally believed to offer potent protection against negative energies and malevolent forces. Chanting these sacred verses creates a divine shield, warding off evil influences and obstacles.
Devotees utilize the PDF text during Navratri and beyond, seeking safeguarding for themselves and their families.
The verses invoke Goddess Durga’s power to dismantle negativity, fear, and harmful intentions directed towards the practitioner.
Consistent recitation, facilitated by the convenient PDF format, strengthens this protective barrier, fostering a sense of security and well-being in the face of adversity.
Fulfilling Desires
Accessing the Durga Saptashloki PDF is often linked to the aspiration of fulfilling heartfelt desires. Devotees believe sincere recitation, guided by the text, can manifest positive outcomes in various aspects of life.
The power of the verses lies in their ability to align one’s intentions with the divine energy of Goddess Durga, paving the way for favorable results.
The PDF format allows for convenient and consistent practice, crucial for focused intention and amplified manifestation.
While not a guarantee, dedicated chanting, using the readily available PDF, is seen as a powerful tool to attract blessings and realize one’s aspirations.

Durga Saptashloki in Different Languages
Durga Saptashloki PDFs are available in multiple languages, including English and Hindi translations, catering to a wider audience and devotional practices.
Regional language versions also exist.
English Translations
Numerous English translations of the Durga Saptashloki are readily available in PDF format online. These translations aim to make the powerful shlokas accessible to devotees who may not be fluent in Sanskrit or Hindi.
Many PDFs include transliteration alongside the English translation, allowing readers to understand the pronunciation and original Sanskrit form of each verse.
The quality of translations can vary, so it’s advisable to seek out PDFs from reputable sources or those accompanied by scholarly commentary.
Free downloads are common, but verifying the accuracy and completeness of the translation is crucial for a meaningful devotional experience.
Hindi Versions
Hindi PDFs of the Durga Saptashloki are widely circulated, catering to a large population of devotees who prefer reciting the shlokas in their native language. These versions often present the shlokas in Devanagari script, alongside transliteration for easier pronunciation.
Many Hindi PDFs also include detailed explanations and interpretations of each shloka, providing deeper insights into their meaning and significance.
Finding authentic Hindi versions is essential, as variations in transcription or interpretation can occur.
Combined with English translations, these Hindi PDFs offer a comprehensive resource for devotees seeking a richer understanding of the Durga Saptashloki.

Other Regional Languages
Beyond English and Hindi, the Durga Saptashloki is available in numerous regional Indian languages, reflecting its widespread devotion across the country. PDFs in languages like Tamil, Telugu, Bengali, Marathi, and Gujarati can be found online, catering to diverse linguistic communities.
These regional PDFs often prioritize cultural context, offering interpretations aligned with local traditions and devotional practices.
Accessibility varies; some languages have fewer readily available, high-quality PDF resources than others.
Devotees can often locate these PDFs through regional language devotional websites and online forums dedicated to Hindu scriptures.

Hema Malini’s Durga Saptshloki
Times Music released Hema Malini’s rendition of powerful shlokas from Durga Saptashati, featuring a unique musical composition by Anjali Dayal.
PDFs containing lyrics may accompany this devotional release.
Times Music Release
Times Music proudly presents Hema Malini’s captivating rendition of the Durga Saptashloki, drawing from the most potent shlokas within the revered Durga Saptashati scripture. This devotional offering, released as an audio collection, aims to bring the sacred verses to a wider audience.
While primarily an audio release, the popularity of the recording has led to requests for accompanying materials. Consequently, unofficial PDFs containing the lyrics to the shlokas, often sourced from various online platforms, have emerged. These PDFs are frequently shared alongside links to the Times Music audio tracks, enhancing the devotional experience for listeners seeking to follow along with the chants.
However, it’s crucial to verify the authenticity of any downloaded PDF, as variations in transliteration and translation can occur.
Musical Composition and Style
Hema Malini’s Durga Saptashloki, released by Times Music, features a musical composition crafted by Anjali Dayal. The style leans towards traditional devotional music, aiming to create a serene and spiritually uplifting atmosphere for listeners. The arrangement incorporates classical Indian instruments, enhancing the sacredness of the shlokas.
PDF versions circulating online often lack the musical nuances, focusing instead on the textual content of the shlokas. However, some enthusiasts create PDFs that include transliterations alongside notations or links to the Times Music audio, allowing for a combined learning and devotional experience. The musical style is intended to aid in focused chanting and meditation.
Durga Apad Uddharaka Stotram Connection
Durga Apad Uddharaka Stotram is frequently found alongside Durga Saptashloki PDFs, often included as a complementary text for enhanced spiritual practice and protection.
Relationship to Durga Saptashloki
The Durga Apad Uddharaka Stotram and Durga Saptashloki share a strong devotional link, frequently appearing together in downloadable PDF collections. Both texts are dedicated to Goddess Durga and aim to invoke her protective energies.
Many online resources offer combined PDFs containing both the seven shlokas of the Saptashloki and the stotram, facilitating a comprehensive worship experience. Devotees often chant both sequentially, believing the combined recitation amplifies the benefits of each, offering greater spiritual upliftment and shielding from adversity.
This synergistic relationship explains their common availability in a single, convenient PDF format for easy access and practice.
Combined Benefits of Chanting
Chanting both the Durga Saptashloki and Durga Apad Uddharaka Stotram, readily available in combined PDF formats, is believed to yield amplified spiritual and protective benefits. Devotees seek fulfillment of desires and freedom from negative energies.
The Saptashloki’s seven verses, when recited with devotion, are said to offer spiritual growth and inner peace. Coupled with the Apad Uddharaka Stotram, which specifically focuses on rescuing devotees from difficulties, the combined practice creates a powerful shield against misfortune and obstacles.
Regular chanting, using a downloaded PDF for guidance, fosters a deeper connection with the Divine Mother, Durga.
Telegram Access and Durga Saptashloki
Telegram Web provides convenient access to Durga Saptashloki PDFs, facilitating easy sharing and dissemination of this sacred text among devotees globally.
Using Telegram Web for Access
Telegram Web offers a practical solution for accessing Durga Saptashloki PDFs directly from your computer without requiring software installation; This browser-based version of Telegram allows users to search for channels and groups dedicated to devotional content, where the PDF is frequently shared.
Simply navigate to web.telegram.org, log in with your account, and utilize the search function to locate relevant communities. Users often share links to downloadable PDFs, ensuring convenient access to the Saptashloki.
Telegram’s sharing capabilities also make it easy to distribute the PDF amongst friends and family, fostering a wider reach for this powerful spiritual practice.
Sharing and Dissemination of the PDF
The Durga Saptashloki PDF’s widespread availability is largely due to easy digital sharing. Platforms like Telegram, as noted, facilitate quick dissemination amongst devotees. Beyond Telegram, email and various social media groups dedicated to Hindu spirituality also contribute to its circulation.
However, caution is advised. While sharing promotes accessibility, verifying the PDF’s authenticity remains crucial. Ensure the source is reputable to avoid corrupted or inaccurate versions of the sacred text.
Responsible sharing involves confirming the PDF’s integrity before forwarding it, preserving the sanctity of the Saptashloki for all practitioners.
The Durga Saptashloki PDF serves as a powerful tool for devotees seeking spiritual upliftment and divine protection. Its accessibility, through various online sources and platforms like Telegram, has broadened its reach significantly.
However, mindful practice is key. Prioritizing authentic PDFs, understanding correct recitation methods, and appreciating the text’s profound significance—especially during Navratri—are essential.
Whether engaging with Hema Malini’s musical rendition or simply chanting the shlokas, the Durga Saptashloki offers a pathway to connect with the Divine Mother’s energy and experience its transformative benefits.