The Honeywell T6 Pro Z-Wave Thermostat offers advanced smart home integration, energy efficiency, and a user-friendly interface. Designed for seamless Z-Wave compatibility, it ensures precise temperature control and remote access capabilities.
Overview of the Honeywell T6 Pro Z-Wave Thermostat
The Honeywell T6 Pro Z-Wave Thermostat is a cutting-edge smart home device designed for seamless integration with Z-Wave systems. It offers advanced temperature control, remote access, and energy-saving features. With its intuitive touchscreen interface, users can easily adjust settings, schedule temperatures, and monitor energy usage; The thermostat supports geofencing, smart recovery, and adaptive learning, ensuring optimal comfort and efficiency. Designed for compatibility with various HVAC systems, it provides flexible installation options, including battery-powered operation without a common wire. Its robust Z-Wave connectivity ensures reliable communication with smart home hubs, making it a versatile and efficient addition to any smart home setup.
Importance of Proper Installation
Importance of Proper Installation
Proper installation of the Honeywell T6 Pro Z-Wave Thermostat is crucial for ensuring optimal performance, safety, and compatibility with your HVAC system. Incorrect installation can lead to system malfunctions, reduced efficiency, and even safety hazards. Ensuring the thermostat is correctly wired and configured guarantees precise temperature control and energy savings. Additionally, proper installation prevents connectivity issues with Z-Wave devices and hubs, ensuring seamless smart home integration. It also avoids potential damage to the thermostat or HVAC system, which could result from improper wiring or setup. Following the installation manual closely helps maintain warranty validity and ensures long-term reliability of the device. Proper installation is the foundation for a trouble-free and efficient smart thermostat experience.

Preparation for Installation
Gather tools, verify system compatibility, and back up current thermostat settings to ensure a smooth installation process for the Honeywell T6 Pro Z-Wave Thermostat.
Tools and Materials Needed
To install the Honeywell T6 Pro Z-Wave Thermostat, you will need a screwdriver for removing the old unit and mounting the new one. Wire strippers may be necessary if the existing wires require trimming or adjustment. A voltage tester is recommended to ensure the power is off before starting. Labels or a marker will help identify wires for proper reconnection. Additionally, a backup battery (if required) and the provided wall anchors and screws from the installation kit will be essential. Having these tools and materials ready ensures a smooth and efficient installation process without delays or complications.
Understanding System Requirements
Before installing the Honeywell T6 Pro Z-Wave Thermostat, ensure your system meets the necessary requirements. The thermostat requires a Z-Wave hub or controller for smart home integration. It is compatible with most HVAC systems, including heat pumps, gas furnaces, and air conditioning units. The thermostat operates on a 24V AC power supply and may require a common wire (C-wire) for consistent operation. If your system lacks a C-wire, a battery-powered option is available. Verify your system’s voltage and type to ensure compatibility. Proper system requirements ensure reliable performance and seamless smart home connectivity, avoiding potential installation issues or operational limitations down the line.
Backing Up Current Thermostat Settings
Before removing your old thermostat, it’s essential to back up your current settings to avoid reconfiguring them from scratch. Start by accessing the menu system of your existing thermostat and navigating to the settings or configuration section. Look for an option to save or export your current settings, such as temperature schedules, heating/cooling preferences, or fan settings. If your thermostat doesn’t have a built-in backup feature, manually document these settings using a notebook or digital tool. This step ensures a smooth transition and maintains your comfort preferences after installing the Honeywell T6 Pro Z-Wave Thermostat. Failure to back up settings may result in lost configurations, requiring you to reprogram everything manually.
Removing the Old Thermostat
Disconnect power, then carefully remove the old thermostat unit from the wall. Gently pull it away to access the wires behind it for labeling.
Safely Disconnecting the Power
To avoid electrical hazards, locate the circuit breaker or switch controlling the thermostat’s power supply. Switch it off and verify the thermostat is unpowered. This ensures safety while handling wires or removing the old unit. Always double-check that the power is off using a voltage tester if available. Never attempt to disconnect or remove the thermostat while the power is on, as this could result in electrical shock or damage to the system. Properly shutting off the power is the first and most critical step in the removal process to protect both the user and the equipment.
Removing the Old Thermostat Unit
After safely disconnecting the power, gently pull the old thermostat unit away from the wall. Some units may be held in place by screws or clips, so carefully release them. Avoid forcing the unit off, as this could damage the mounting bracket or surrounding area. Once removed, take note of the wire connections for later reference. If the thermostat is particularly stubborn, check for any hidden screws or adhesive strips holding it in place. Handle the wires with care to prevent bending or damage. If the unit is stuck due to age or grime, gently rock it back and forth while pulling to dislodge it safely.
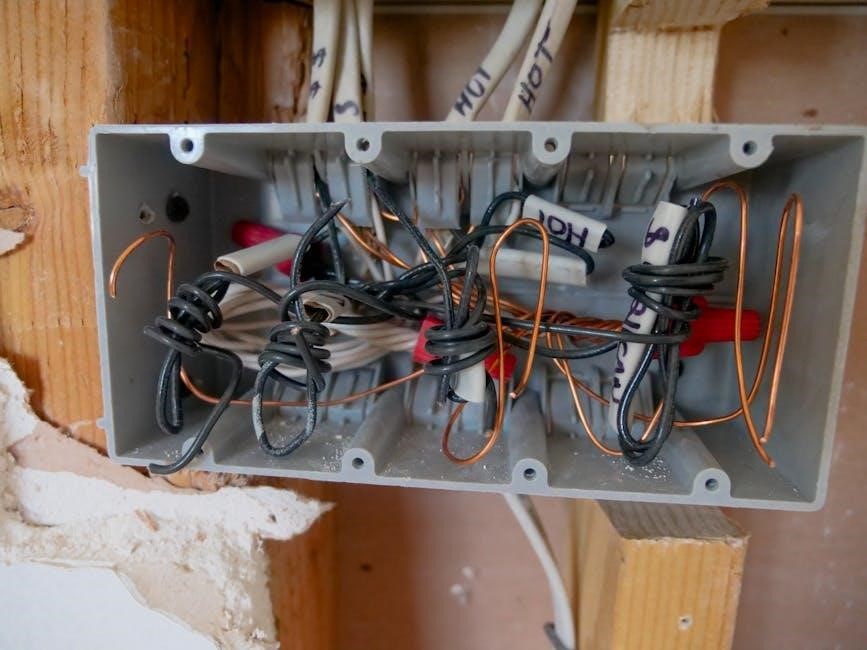
Labeling the Wires for Easy Reconnection
Once the old thermostat is removed, carefully label each wire to ensure proper reconnection later. Use a permanent marker to note the function of each wire (e.g., R, W, Y, G, C) on the ends. You can also use small sticky labels or wire markers for clarity. This step is crucial to avoid confusion during the installation of the Honeywell T6 Pro Z-Wave thermostat. Double-check the labels for accuracy and consider taking a photo or creating a diagram as a backup. Proper labeling ensures a smooth and error-free installation process, preventing potential issues with your heating or cooling system.

Installing the Honeywell T6 Pro Z-Wave Thermostat
Proper installation ensures smooth operation. Mount the thermostat, connect labeled wires, and power it on. Follow the manual for precise wiring and setup to avoid errors.
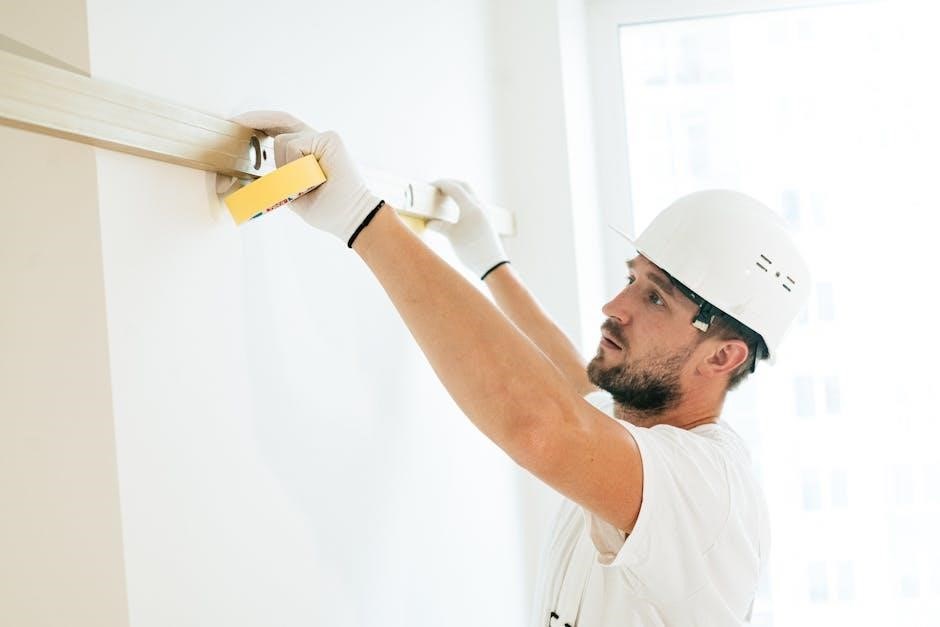
Mounting the New Thermostat

Mounting the Honeywell T6 Pro Z-Wave Thermostat begins with ensuring the wall bracket is level and securely fastened. Use the provided screws to attach the bracket to the wall, aligning it with the wire openings. Gently pull the wires through the bracket to avoid damage. Once the bracket is installed, carefully attach the thermostat to it, ensuring a snug fit. Use the screws provided to secure the thermostat in place. Make sure the device is straight and evenly aligned for proper functionality. If necessary, adjust the thermostat’s position to accommodate any wiring. Proper mounting ensures accurate temperature sensing and smooth operation.
Connecting the Wires to the T6 Pro
Connecting the wires to the Honeywell T6 Pro Z-Wave Thermostat requires careful attention to ensure proper functionality. Begin by matching each wire to the corresponding terminal on the thermostat, using the wiring diagram provided in the manual. Gently insert each wire into its designated terminal, ensuring a secure connection. For systems without a common wire, the T6 Pro can operate in a battery-powered configuration, eliminating the need for a C-wire. Once all wires are connected, double-check to ensure no wires are loose or misplaced. Proper wiring is essential for reliable operation and to prevent potential issues during use.
Powering On the Thermostat
After connecting the wires, restore power to the system at the circuit breaker or fuse box. The Honeywell T6 Pro Z-Wave Thermostat will automatically power on, and the display will light up. If the thermostat is battery-powered, ensure the batteries are installed correctly. Once powered on, the thermostat will initialize, and you may see a brief setup menu. Use the touchscreen interface to navigate through any initial setup prompts. If the thermostat does not power on, check the wire connections and ensure the power source is functioning properly. Proper power-up is essential for initializing the thermostat’s smart features and Z-Wave connectivity.
Configuring the T6 Pro Z-Wave Thermostat
Configure the T6 Pro Z-Wave Thermostat by navigating its menu system to set up Z-Wave integration, adjust heating and cooling options, and customize settings for optimal performance and energy efficiency.
Navigating the Menu System
The Honeywell T6 Pro Z-Wave Thermostat features an intuitive menu system designed for easy navigation. Access the menu by pressing and holding the menu button for 5 seconds. From there, you can explore options like Device Setup, System Settings, and Advanced Configuration. Use the touch screen to scroll through menus and adjust settings such as temperature limits, scheduling, and energy-saving modes. The menu also provides access to Z-Wave integration settings, allowing you to connect the thermostat to your smart home network. Ensure you write down your current settings before making changes to avoid losing important configurations. Proper navigation ensures optimal performance and customization of your thermostat to meet your specific needs.
Setting Up Z-Wave Integration
To set up Z-Wave integration for the Honeywell T6 Pro Z-Wave Thermostat, start by ensuring the device is in inclusion mode; Press and hold the menu button for 5 seconds to access Device Setup. Select Z-Wave inclusion and follow the prompts to connect the thermostat to your Z-Wave hub or controller. Once paired, the thermostat will integrate seamlessly with your smart home system, enabling remote control and automation. If issues arise, perform a device exclusion by removing the thermostat from your hub and repeating the inclusion process. Proper Z-Wave setup ensures reliable performance and enhances your smart home experience with advanced temperature control capabilities.
Configuring Heating and Cooling Options
Once the Honeywell T6 Pro Z-Wave Thermostat is installed, configure the heating and cooling options to match your HVAC system. Navigate to the menu system and select “System Settings.” Choose the appropriate system type, such as heat pump, gas furnace, or electric heat, to ensure proper functionality. Set your preferred temperature ranges for both heating and cooling modes. Enable features like geofencing or smart recovery to optimize energy usage. If using a heat pump, configure auxiliary heat settings to balance efficiency and comfort. Schedule custom temperature profiles to align with your daily routine. Always verify compatibility with your HVAC system to avoid performance issues. Adjust settings as needed to achieve optimal comfort and energy savings.

Troubleshooting Common Issues
Address common issues like connectivity problems or installation errors by checking wire connections, restarting the thermostat, and ensuring Z-Wave integration is properly set up.
Device Exclusion Process
To exclude the Honeywell T6 Pro Z-Wave Thermostat from your existing network, press and hold the menu button for 5 seconds to access Device Setup. Navigate to Z-Wave settings and select the exclusion option. This process ensures the thermostat is removed from your current Z-Wave network, allowing it to be properly included in a new system. Use your Z-Wave hub or controller to complete the exclusion process. If issues persist, perform a factory reset before re-including the device. This step is crucial for resolving connectivity problems and ensuring smooth integration with your smart home system.
Resolving Connectivity Problems
Ensure a stable Z-Wave network connection by verifying the thermostat’s proximity to your hub or controller. If connectivity issues arise, reset the thermostat by pressing and holding the menu button for 10 seconds. Check wiring connections for accuracy and ensure no loose wires. Power cycle the thermostat by turning it off and on at the circuit breaker. If issues persist, perform a factory reset and re-include the device in your Z-Wave network. Ensure the thermostat is updated to the latest firmware for optimal performance. If problems remain unresolved, consult the user manual or contact Honeywell support for further assistance.
Addressing Installation Errors

Common installation errors include incorrect wire connections, improper system configuration, or failure to complete the inclusion process. Verify all wires are securely connected to the correct terminals, matching the labels from the old thermostat. Ensure the system is set to the right mode (heat/cool) and compatibility with your HVAC system. If the thermostat fails to power on, check the circuit breaker and ensure the power is switched on. For Z-Wave integration issues, perform a device exclusion by pressing and holding the menu button for 10 seconds, then re-include the thermostat in your network. Consult the manual for detailed troubleshooting steps.
Successful installation ensures optimal performance. Perform final checks, test all functions, and confirm Z-Wave integration. Proper setup guarantees energy efficiency and seamless smart home control.
Final Checks and System Testing
After installation, perform a thorough system test to ensure all features function correctly. Check temperature accuracy, heating/cooling operations, and Z-Wave connectivity. Verify that the thermostat responds to remote commands and integrates seamlessly with your smart home system. Test scheduling, geofencing, and energy usage reporting if applicable. Ensure all wired connections are secure and the display is responsive. Restart the system if necessary to confirm stability. Review settings to match your preferences for optimal performance. If issues arise, consult the manual or reset the device. Proper testing guarantees reliability and efficiency, ensuring your Honeywell T6 Pro Z-Wave Thermostat operates as intended.
Maintaining Your Thermostat
Regular maintenance ensures optimal performance and longevity of your Honeywell T6 Pro Z-Wave Thermostat. Start by checking for firmware updates to keep your system secure and feature-rich. Clean the thermostat regularly with a soft cloth to prevent dust buildup, which can affect temperature accuracy. Inspect and replace batteries as needed, especially if the thermostat is battery-powered, to avoid sudden shutdowns. Periodically review and adjust settings to reflect changes in your schedule or preferences. Calibrate the thermostat if temperature readings seem off, following the instructions in the manual. Lastly, monitor wire connections to ensure they remain secure and functional. Proper upkeep guarantees reliable operation and energy efficiency.